By Owen Palmer
Updated November 2026
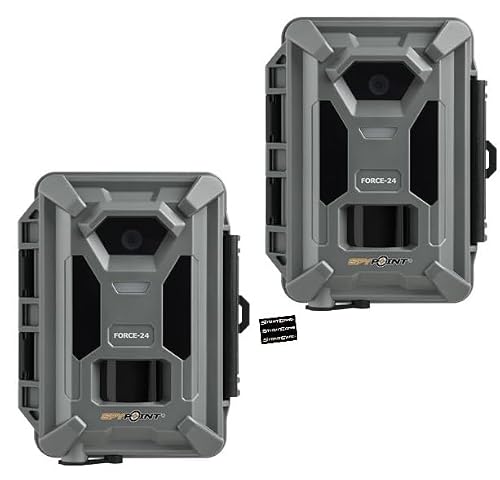
A cellular trail camera works by detecting motion, taking a photo or short video, and sending that image through a cellular network to your phone or computer. Once you understand the four parts involved, the sensor, the camera, the cellular modem and the data plan, you can set one up so pictures arrive reliably. This guide explains how each piece fits together and what to check before you leave the truck.
The Four Parts That Make It Work
Every cellular trail camera combines a standard trail camera with a built-in modem. The camera part handles detection and capture, while the modem handles transmission. Here is what each component does.
Shopping for one? See our guide: Muddy Trifecta 180 Cellular Trail Camera: 6 Best Options Compared (2026).
- Passive infrared (PIR) sensor: Detects heat and movement in its field of view and triggers the camera.
- Image sensor and lens: Captures the photo or video when triggered, usually within a fraction of a second.
- Cellular modem: Connects to a carrier network the same way a phone does, using a SIM card or built-in data chip.
- Data plan: Gives the modem access to the network. Without an active plan, the camera can still store photos on the SD card but cannot send them.
How a Photo Travels From the Woods to Your Phone
The sequence happens in a few seconds, and the timing depends on signal strength and file size. Manufacturers generally describe the process as follows.
- The PIR sensor detects a warm body moving across its detection zone.
- The camera captures one or more images and saves them to the SD card.
- The modem checks for a signal and uploads the image to the manufacturer’s cloud server or directly to an app.
- The server or app pushes a notification to your phone, and the image appears in the gallery.
Some models send a low-resolution thumbnail first and the full image later. Others send only when you request it. Settings vary by brand, so check your camera’s manual for the exact behavior.
What Affects Whether Pictures Get Through
Signal strength is the biggest factor. A camera with one or two bars of service will upload more slowly and may drop transmissions. Check coverage at the exact spot before mounting, not just at your home address. Several other factors matter as well.
- Carrier coverage: Verify that the network your SIM uses covers the location. Coverage maps from carriers are a starting point, not a guarantee.
- Image size and resolution: Higher-resolution files take longer to upload and use more data.
- Trigger settings: Rapid multi-shot bursts and video send more data than single photos.
- Battery level: Cold weather drains batteries faster, and transmissions consume more power than storing images locally.
Setting Up a Cellular Camera Step by Step
Setup mostly involves activating service and pairing the camera with an app. The steps below cover the typical process.
- Insert the activated SIM card or confirm the built-in plan is active with your carrier.
- Install the SD card and format it in the camera.
- Download the manufacturer’s app, create an account and register the camera using the ID or QR code on the device.
- Walk to the mounting spot and check signal with the camera’s signal test mode. Move the camera or mount it higher if signal is weak.
- Set trigger frequency, image count and sending preferences, then send a test photo before you leave.
For carrier-specific activation steps, see Verizon Trail Camera Plan: Which Plan Works and How to Set It Up or US Cellular Trail Camera: Why It Won't Connect and How to Fix It. If you are weighing data options, Trail Camera Data Plan: How to Choose and Save on Cellular Service covers the tradeoffs.
Recommended gear
A few supplies make setup and placement easier. A small signal-testing aid helps when you need to compare spots, and a sturdy mount keeps the camera aimed correctly through wind and rain.
- A cellular-compatible trail camera mount with adjustable straps helps keep the sensor angled at the trail. View on Amazon
- A high-capacity SD card rated for continuous recording reduces write errors in heavy-trigger spots. View on Amazon
- A lockable steel cable keeps the camera secure against theft. View on Amazon
Common Mistakes
- Mounting before testing signal at the actual spot.
- Letting the data plan lapse before hunting season starts.
- Aiming the sensor into the sun or at fast-moving brush, which causes false triggers.
- Setting high-resolution video on every trigger, which drains data and battery quickly.
- Forgetting to check the SD card and battery between visits.
FAQ
Does a cellular trail camera need a SIM card?
Most models need an active cellular plan, delivered through a SIM card or a built-in data chip. Without service, the camera still records images to the SD card but cannot send them to your phone.
Why are my photos arriving slowly?
Slow delivery usually means weak signal or large file sizes. Test signal at the mount location and consider lower resolution or fewer images per trigger.
Can a cellular camera work without cell coverage?
It will still capture and store photos on the SD card. Those images can be retrieved manually once you return to a spot with signal or by removing the card. Check your camera’s manual for details, and consult your carrier about coverage questions.
Conclusion
A cellular trail camera combines motion detection, image capture and a cellular modem to deliver photos to your phone. Signal strength, data settings and an active plan determine how reliably those photos arrive. Test coverage at your exact spot, and you will avoid most delivery problems before the season starts.
Ready to choose one?
About Owen Palmer
Owen Palmer is part of our editorial team and reviews and edits our hunting guides, checking product details against manufacturer specifications and owner feedback.